
Camera Manager Frequently Asked Questions
Eagle Eye CameraManager User Application
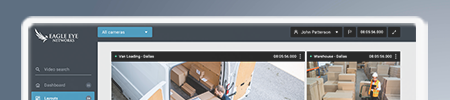
Eagle Eye CameraManager end-user application provides quick and easy access to your cameras and footage. You can download the mobile application, available for both Android and IOS, or download the desktop application, available for macOS and Windows. For the download links, go to https://www.een.com/cameramanager-mobile-app/ or go to https://downloadportal.cameramanager.com/ and sign in with your username and password.
Yes, it has. If you do not prefer to install any application to your computer, you can use the CameraManager web application on any web browser. To access the web application, go to https://webapp.cameramanager.com/ and login with your username and password.
Download the desktop application installer for your operating system, we support macOS, and Windows operating systems. For the download links, go to https://www.een.com/cameramanager-mobile-app/ or go to https://downloadportal.cameramanager.com/ and sign in with your username and password.
If you use macOS download the CameramanagerMac.dmg file and double click on it to start the installation. Follow the wizard to complete the installation. The CameraManager application will start automatically after the installation.
If you use Windows download the CameramanagerWin.exe file and double click on it to start the installation. Follow the wizard to complete the installation. The CameraManager application will start automatically after the installation.
We will renew your subscription automatically. This renewal does not depend on the type of your subscription. You can keep on using the application without any interruptions.
If you want to change your subscription please contact your reseller.
If you want to cancel your subscription please contact your reseller.
Mobile apps automatically open in the language that the operating system on a smartphone or tablet is set to. To change the language of the Eagle Eye CameraManager app on a smartphone or mobile, you need to change the language of your operating system.
If you use the desktop application, you can select the language in the login screen. If you are already logged in, you should log out first.
If you use the web application click on the ‘My Account’ icon on the top right corner and click on the current language and select a different language from the given list.
Click on the ‘Account Settings’ icon on the top right corner. You can change your personal details, email, password, support access permission on the ‘Account Settings’ page.
You can reset your password by clicking on the ‘Forgot your password’ link in the login screen, enter your email address and click on the ‘Send’ button.
If you are already logged in the application, go to ‘Account Settings’ and enter a new password in the ‘Change Password’ section.
Choose the Zone you want to add the camera to. Click on the ‘Add Camera’ button.
- Plug the network cable from your router into your camera
- Plug the power adapter of your camera into a power outlet.
- Make sure your phone or your computer (the device you use the CameraManager app) is connected to the same local network via Wi-Fi.
Your camera will be automatically detected and will be visible on the list. Click on the camera you want to add and that is all. If your camera supports a Wi-Fi connection, you can plug off the network cable from your camera after the setup.
On the mobile app, click on one of the Zones and click on the ‘Settings’ icon on the bottom right corner of the screen. Then, click on the camera to view and update the camera settings.
On the DesktopApp and WebApp, click on the settings button in the top menu. From there you can change all the camera settings.
When you go to Camera Settings, you can view and update the following camera settings:
- Wi-Fi
- Detections (Video motion, Infrared, Sound)
- Smart Video Analytics
- Detection Area
- Scheduling, Geofencing
- Notifications
- Video Streaming Settings (Recording type, Resolution, FPS, Max Bandwidth, Advanced video settings)
- Microphone
- Mode (Armed, Scheduled, Disarmed, Silent)
On the desktop application, It is possible to add several sub users to your account . In this way they can login to the application with their own username and password. The super user assigns rights for the sub users.
To add a sub user, click on the ‘Settings’ button. On the Settings page click on the ‘Users’ button and click on ‘Add new user’ button. The sub user can only access the cameras that are assigned by the super user.
If you want to turn off all push notifications, go ‘Account Settings’ by clicking on the top right corner of the screen and disable the ‘Push Notification’ option.
Eagle Eye CameraManager Dealer Dashboard
CameraManager Dealer Dashboard is a web application for our resellers and distributors to allow them to administer their clients. To access the Dealer Dashboard go to https://dealer.cameramanager.com and login with your username and password.
You can manage your users, meaning you can view, create, change and deactivate them. It also allows a reseller to upgrade/downgrade user subscriptions.
Sign in to https://dealer.cameramanager.com, select a user and go to the left menu “Cloud Subscriptions”. By clicking on the three dots on the top right you can edit the subscriptions. Upgrades are happening immediately and downgrades happen at the end of the service period.
Adding and changing cameras is not possible, you have to sign in as an end user. You can sign-in on behalf of an end user via support-access. This is only possible if the user grant the reseller access. By default this is disabled.
There is no limit to the numbers of users.
Yes, the Dealer Dashboard supports both distributors and resellers. If you sign in as a distributor you can create,delete and update all resellers that belong to your distributor. A distributor can have one or more resellers, a reseller can have one or more customer accounts, and a customer account can have one or more cameras.
CameraManager Cameras
The supported cameras and data sheets are available on https://www.een.com/docs/
Couldn’t find your answer?
+31 (0)20 26 10 460
Business days
9:00 AM – 5:30 PM (Central European Time)