
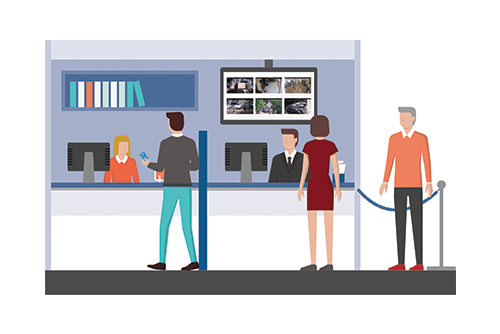
Local Display
A user with permission “Administrator” or “Edit All and Add” is required to enable Local Display. The user must sign into the Eagle Eye Networks Cloud, and from the Dashboard, click the gear icon next to the bridge to open Bridge Settings. Then, select the Local Display tab.
Bridge Settings – Local Display
Local Display can be enabled separately for connecting an external monitor (via Monitor) and for viewing live video on the Local Area Network (via Browser). A list of available layouts is on the left, and it’s searchable – only layouts that have cameras attached to the bridge will appear.
You can select the layouts by dragging and dropping them to the right list, which is for layouts on display – any layout listed here will be available on the Local Display. “Add All” and “Remove All” buttons appear at the bottom left and bottom right and can be used to add or remove the search results in each column. The default layout is “All Cameras,” which is equivalent to the tag view of the same name located on the left of the Eagle Eye Cloud web interface.

Dashboard – Tags
Save your settings to enable/disable the modes selected or to update any other changes. Also, make note of the IP address of the bridge – it appears on the first tab of “Bridge Settings” under “Bridge Information: IP Address.” If the numbers are in blue, it indicates Local Display via Browser is enabled and is a clickable link.
Bridge Settings – Bridge Information – IP Address
Whether viewing via Browser or Monitor, the Local Display feature works almost identically– they even share most of the same keyboard commands.
Local Display via Browser
This option must be enabled to login directly using the Bridge’s IP Address. If a login is attempted without the option enabled, an error message will display. Using a computer on the same LAN (Local Area Network) as the Bridge, enter the IP Address of the Bridge into a browser. If enabled, the Eagle Eye login screen will display. A valid user on the account is required to successfully sign in. The video will immediately display from its default layout.
Local Display via Browser
Interface
The top left corner displays a three-line menu button, which lists the available layouts that can be selected. You can also change the layouts by using the “Page Up” or “Page Down” keyboard commands. 
Local Display via Browser – Layout Selection Menu
The top right corner displays a question mark button, which takes you to the help file. Just to the left of the question mark, is a full-screen icon, which toggles your display to full-screen. The “Esc” key toggles full-screen off.
Any camera can be viewed in Full Resolution by clicking directly on the preview image. Clicking the back button, located in the upper left, turns Full Resolution off and returns to the layout. Pressing “Spacebar” also toggles Full Resolution.
Local Display via Browser – Full Resolution Video
To select a camera, use the left and right arrows on your keyboard and then press “Spacebar” to toggle to Full Resolution. A light blue outline will indicate the camera that is currently selected.
Keyboard Commands
- Spacebar: Toggles Full Resolution for the selected camera
- Esc: Exit full-screen mode
- Left Arrow: Select camera left
- Right Arrow: Select camera right
- Page Up: Next layout
- Page Down: Previous layout
Local Display via Monitor
All Eagle Eye Networks Bridges/CMVRs have the ability to connect an external monitor – the type of connection varies based on the model. Most models have HDMI ports, but some models have a combination of HDMI, DVI, VGA, or Display ports. Typically, an external monitor and USB keyboard are used if the Bridge/CMVR needs specific network settings, such as a static IP – a USB mouse is NOT supported. With Local Display, live preview and full resolution video will show on the external monitor when enabled.
Keyboard Commands
- H: Shows the keyboard commands that are available
- S: Start/Stop audio for selected camera (audio must be enabled on the camera)
- Spacebar: Toggle Full Resolution for the selected camera
- Esc: Hide highlight
- Page Up: Next layout
- Page Down: Previous layout
- Arrows: Select camera left, right, up, down
- Q: Turns off local display temporarily [For maintance– if this option is used, Local Display via monitor must be (1) toggled off and then back on using the Local Display tab of Bridge Settings on the Eagle Eye Cloud, (2) Local Display enabled via the local Administrator console, or (3) the Bridge must be power cycled to see live video again. Power cycle returns Local Display to the previously saved state.]

Since 2012, Eagle Eye Networks has provided smart cloud surveillance solutions, leveraging AI to drive natural language search, automation, and more. Eagle Eye’s camera-agnostic approach heightens security while saving money, time, and resources.
Other posts that might interest you


Cloud Video Surveillance Weekly Summary
Eagle Eye Networks now offers a weekly email to our resellers’ administrators that summarizes the status of accounts managed by that reseller. The Cloud Video Surveillance Weekly Summary is an…
December 6, 2018

Loitering Analytic
Loitering detection monitors a defined area and will trigger a loitering event if an object lingers longer than the configured dwell time. Loitering events can also be set up to…
November 29, 2018
Arlo Flexpower
Have you ever wanted to use battery-operated wireless cameras for professional video surveillance? Sure there are a few wireless cameras, but they require power, which means the camera is still…
September 12, 2018